MFA Policies
The purpose of this section is to understand setup instructions for OmniDefend MFA policies. OmniDefend MFA policies allow segmented provisioning of MFA methods to particular users and applications only, giving the organization a greater level of granularity over which MFA methods can be used for authentication in different applications. Using this feature, an admin can create a policy, outlining a set of scenarios in which different MFA methods can be used, and provision that policy to relevant applications.
Begin by navigating to the MFA policies tab on the left-hand side panel. There are three options, as shown in the image below:
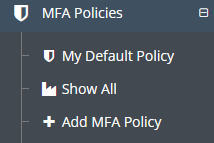
Default Policy
The default MFA policy is the policy which applies to all applications by default. Anytime an application is opened by an admin in the portal, the policy (in this case default) is viewable like so:

Left-Click the button to set up the default policy by clicking
MFA Policies>My Default Policy. The following page will appear: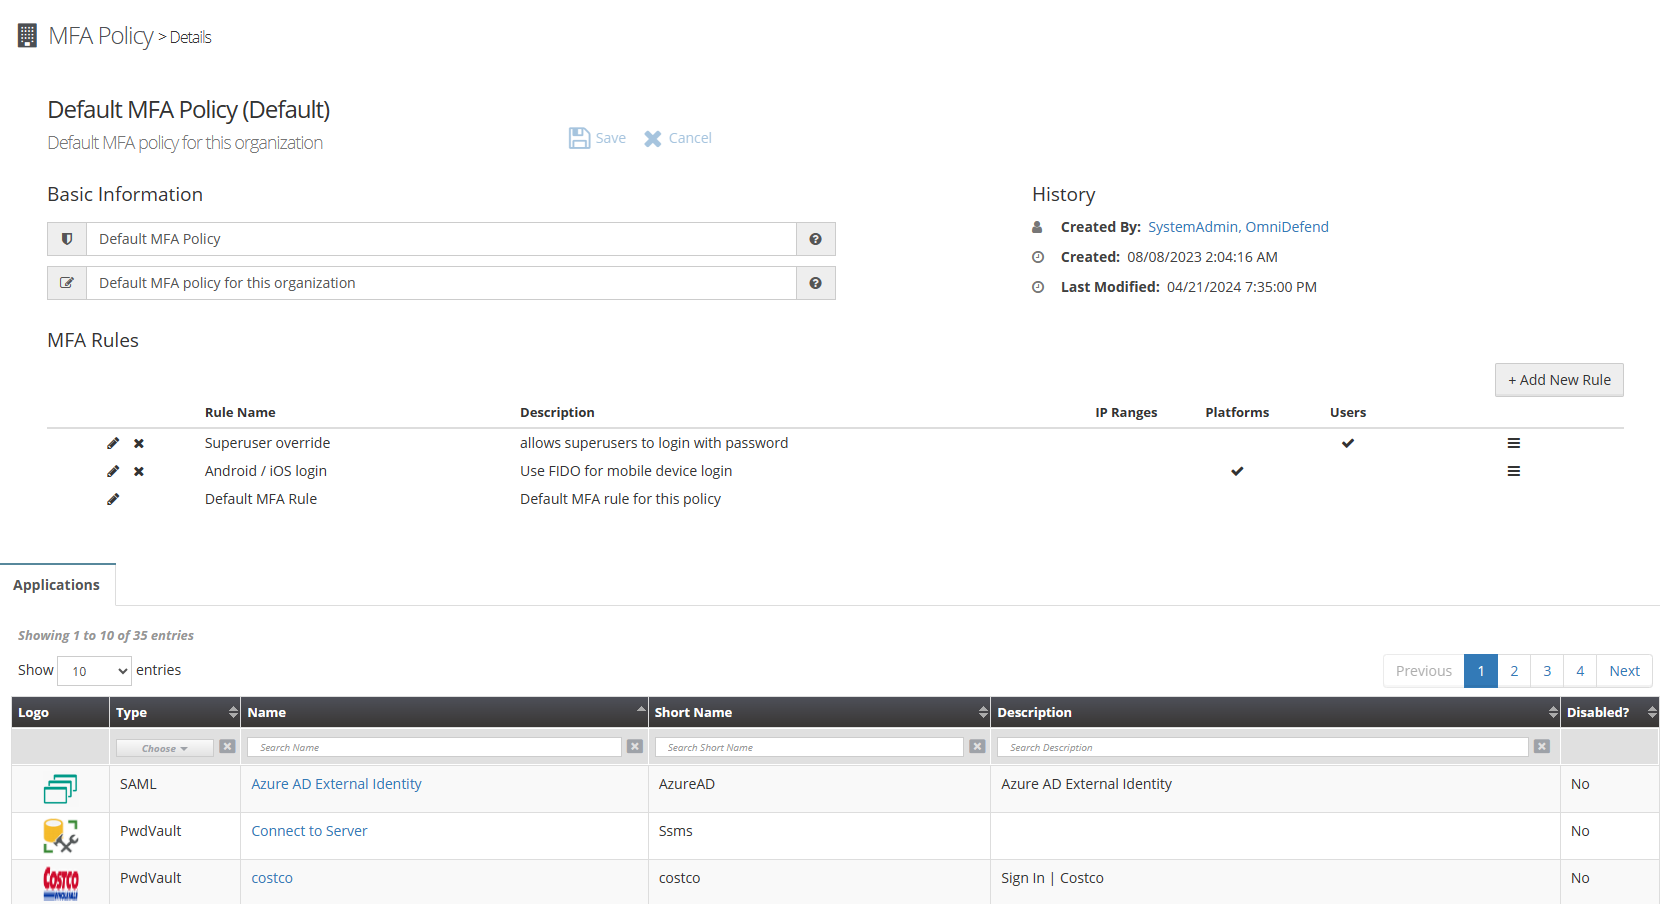
Note
please note that the bottom portion of the screen is quick access to applications for use in provisioning MFA policies.
As you can see, the admin has configured 3 different Default MFA Policy Rules for this organization. They are visible under the label
MFA RulesClicking the two labels under
Basic Informationallows you to edit theNameandDescriptionof the Default Policy.
Adding an MFA Policy Rule
To add a
New Rule, click the+Add New Rulebutton on the right side of the screen. The following page will come up: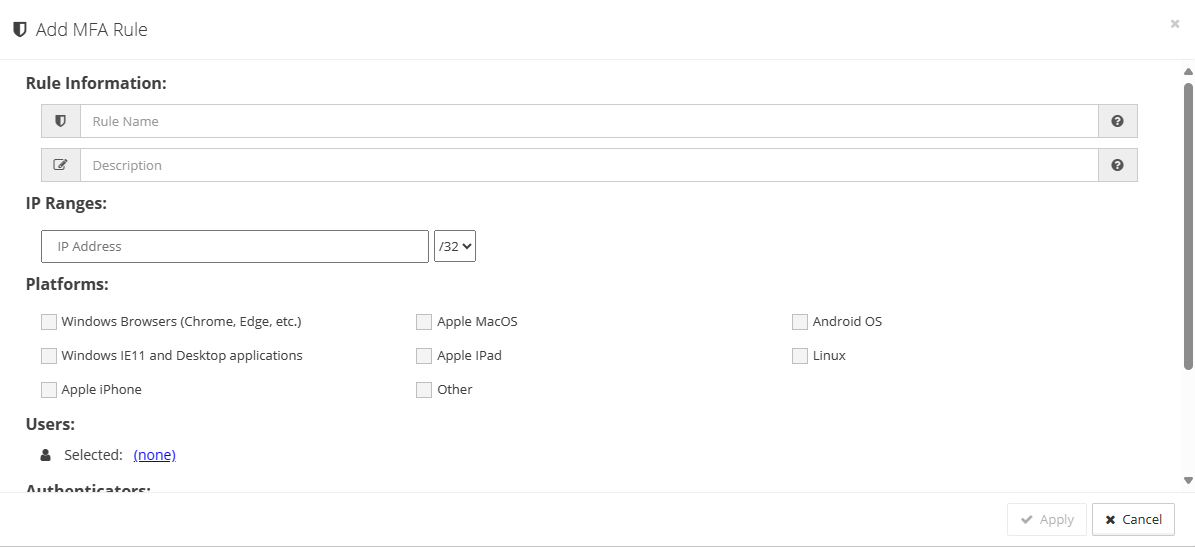
First, click the two buttons under
Rule Informationto set theRule Nameand theDescriptionlike so:
Next, fill-in specific IP addresses or IP Ranges to whom this MFA policy will apply. Enter in the IP Address, and select a value for the IP range from the dropdown to the right of the IP address field:

Next, select the different platforms which you want this MFA policy to be applicable for. For example, selecting
Windows Browsers (Chrome, Edge, etc.)will make the default policy applicable for any user on that platform. The list of platform options is as seen below:
The MFA policy Rule is configurable to only be applicable to a certain user or set of users. If a superuser override would be useful to your organization, this would be the right place to set it up. By default, this is set to
none, meaning applicable to all users. To provision the MFA rule to a single user or set of users, click thenonebutton hyperlinked in the image below:
Clicking
nonewill populate a list of users, from which I can select one or more for the MFA Policy rule, as seen in the image below: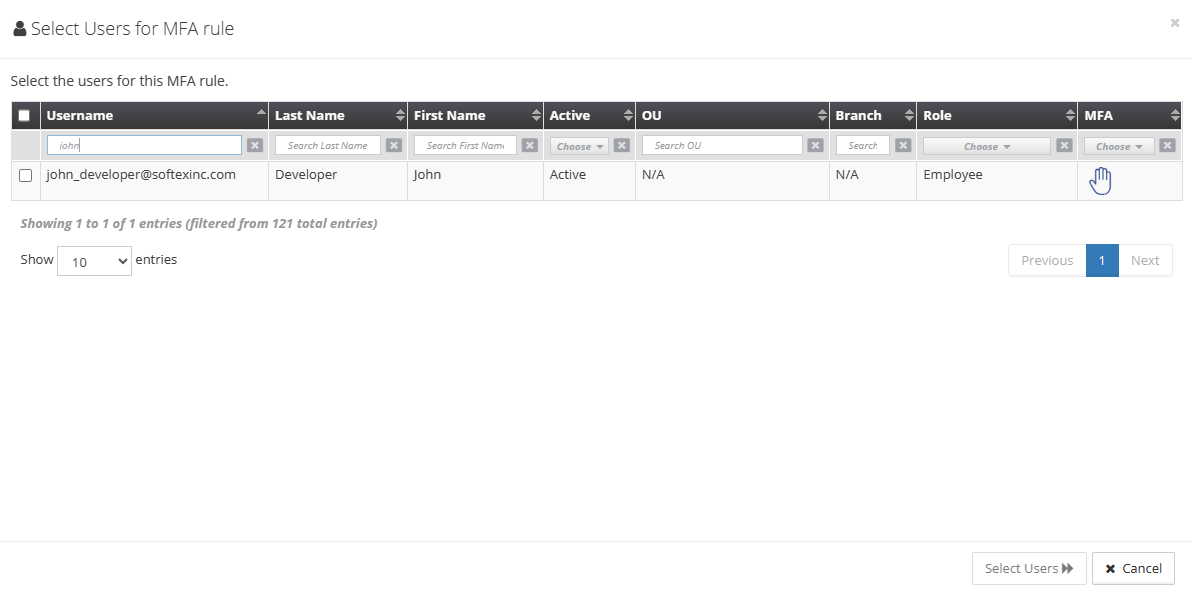
Multi-Factor Authentication
Lastly, and perhaps most importantly, select the authentication factors for the MFA Policy Rule. As you can see in the image below, click
+Add New Factorto prompt the user for authentication. Adding multiple factors will prompt the user to authenticate with more than one MFA method.
Tip
The MFA Policy Rule feature allows you to set as many authentication factors as there are authentication methods setup within the organization. Authentication factors will be prompted to user in the order they are set here.
Tip
You can also configure multiple authentication methods within one specific factor, giving the user an option to use one of many authentication methods during the login process.
Clicking
+Add New Factorwill prompt you with a selection of authentication methods, like so.Note
this will vary based on the MFA methods provisioned to your organization
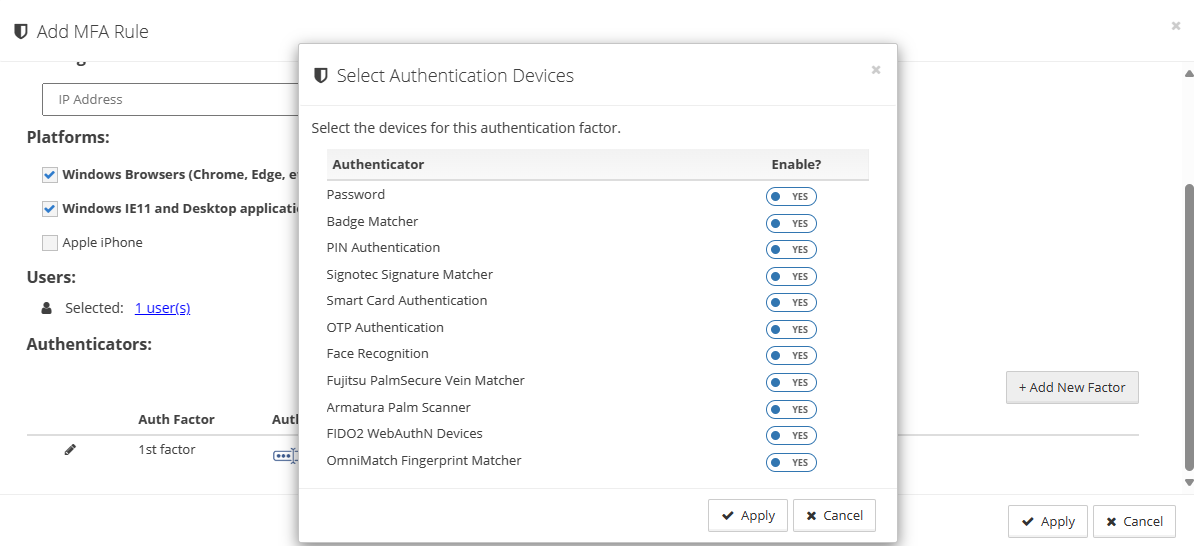
Caution
By default, only one single authentication factor is added, with all the mfa methods enabled as login options. Deselecting some options, will enable those options in a second factor of authentication.
If I delesect options for all but
Smart Card AuthenticationandOTP Authentication(as seen in the image below), only those will be enabled in my first factor, and the rest of the options will be available to be configured for the second factor.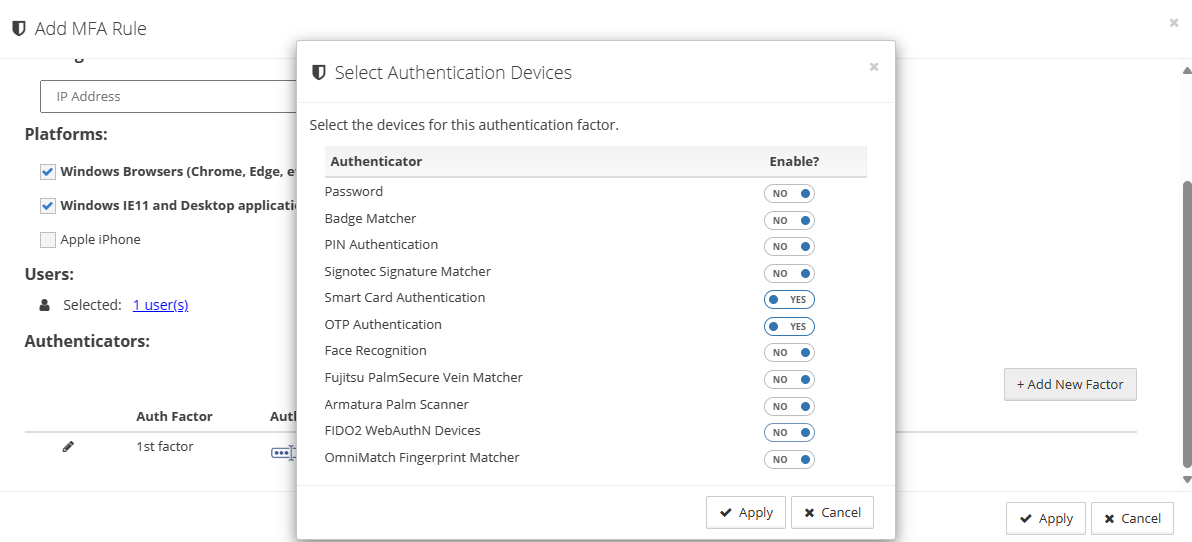
After clicking apply, my authenticators list will look like so:

And if I click
+Add New Factor, all options except Smart Card and OTP will be available to me, and deselected by default, as you can see below: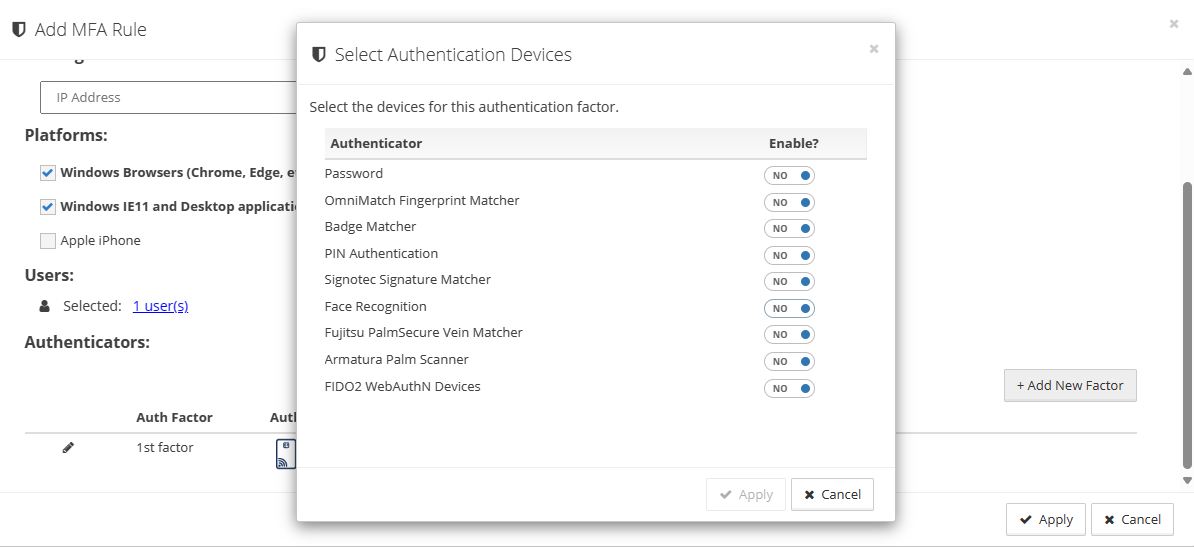
After selecting, for example
PIN Authenticationfor my second factor and clicking apply, my two factors of authentication will be shown like so: